Redtail CRM offers subscribers a ton of opportunities to customize their CRM, both at the individual and at the database level. These opportunities for customization are important because they allow you to set your database preferences and lists up in ways that work the best for both you as an individual as well as for your office. Taken together, these customization options will help drive user adoption and, ultimately, help you streamline your processes while at the same time personalize and improve the client experience your firm provides.
You can browse all prior posts in this series here. In this post, we’ll take a look at how you can manage Activity Templates.
Within Redtail CRM, you have the ability to create Activity Templates for ongoing use by all users of your CRM. We like to think of templates as starting points (or head starting points) as they can save you a bunch of clicks and selections when you’re creating something in Redtail that allows you to use templates.
Activity Templates can be built by any of your database users, and, once built, are accessible by all of your database users. Again, their purpose is to make things easier by allowing users who are creating a common activity to have as much data on that activity as is possible pre-filled. It’s also important to note that any of the pre-filled data in an Activity Template can be overridden during the creation of an individual activity using that template, i.e., just because data is pre-filled doesn’t mean you are stuck with it if circumstances warrant a different selection for a given field.
Now, let’s move on to creation and usage of Activity Templates in Redtail CRM.
Creating your Activity Templates
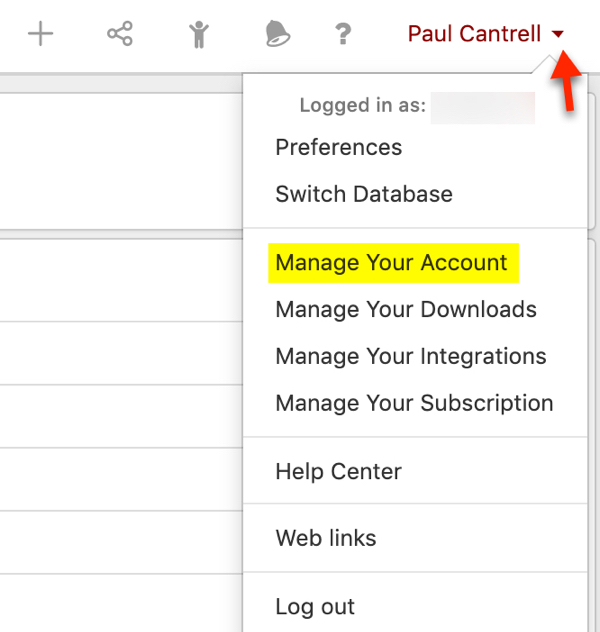
To begin setting up an Activity Template, select Manage Your Account after clicking your Name from the Top Right Menu within Redtail:

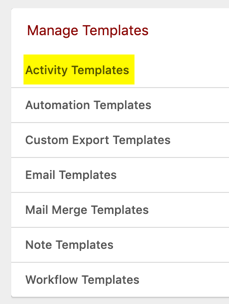
Then, click “Activity Templates” in the Manage Templates area:

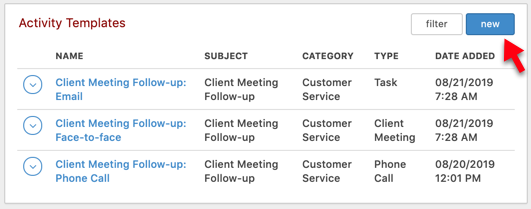
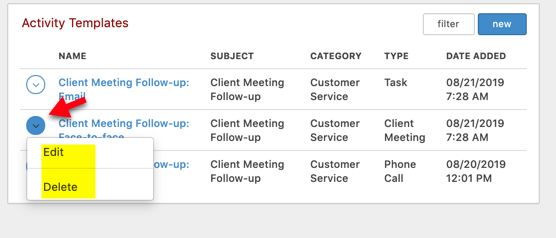
You’ll then see existing Activity Templates in your database (if any):

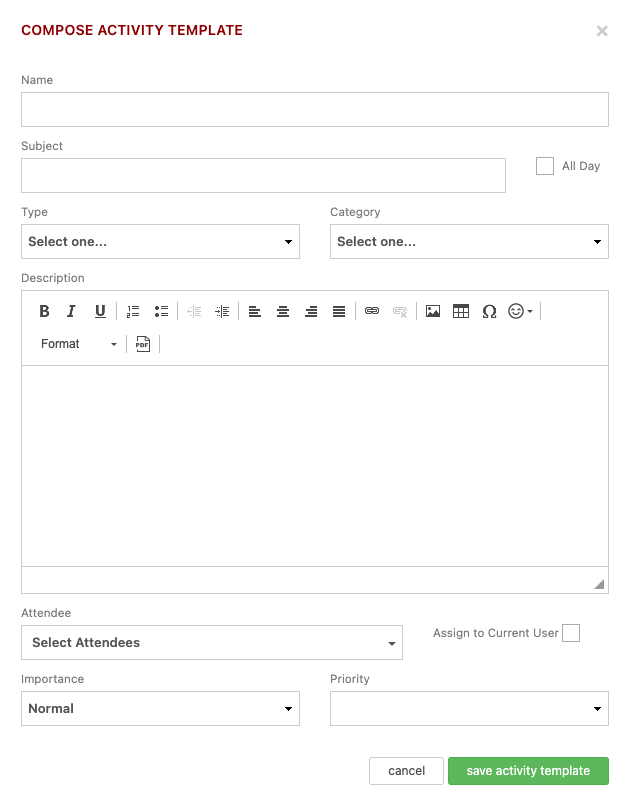
Click “new” and you’ll arrive at the modal where you can begin setting up your Template:

Let’s break down all of the available template fields:
- Name – whatever you enter here will serve as the name of the activity template. Be very descriptive here, as you (and all users of your database) will need to be able to distinguish between your Activity Templates when selecting one during the activity creation process. If you scroll back up to the existing Activity Templates above, you’ll see that we’ve broken a common activity, Client Meeting Follow-up, down into three separate templates, as some of the details will change based upon how that follow-up occurs.
- Subject – this will serve as the subject of the activity, and will display on your Calendar and in Activity reports.
- All Day box – checking this off will set this template to create activities as All Day, rather than timed, events by default.
- Type – choose from one of your CRM’s system or custom Activity Types. Learn more about creating Activity Types for your CRM here.
- Category – choose from one of your CRM’s system or custom Activities and Notes Categories. Note: there is a “filter” option above your Templates that will allow you to filter which Activity Templates you are viewing by Category, should you desire. Learn more about creating Activity Categories for your CRM here.
- Description – You can enter as little or as much as you like here. We recommend entering formulaic text for the type of activity you are creating that will not vary much from instance to instance of this particular sort of activity, leaving room to add the details that will vary. Note as well that you have a formatting bar above your Description box that allows you to format data here in several different ways.
- Attendees – Select the database user(s) that should be linked by default to activities using this template. Note the “Assign to Current User” checkbox, which, if checked off for the template will automatically link the individual who is using the template as an Attendee when creating an activity.
- Importance and Priority – select default importance and priority for activities using this template.
Note again: for all of the fields above (other than the Name), you can edit these on-the-fly when actually using a Template to create an activity.
Let’s go back to your Activity Templates screen before looking at how you would use these to create an Activity:

As you can see above, if you click the Actions icon for an Activity Template on this page, you can Edit or Delete the template. If you choose the Edit option, you’ll see the same modal that you saw above when adding a new one – of course, it will already be completed. You’ll just need to make any necessary changes and save the template to complete those edits.
Using your Activity Templates
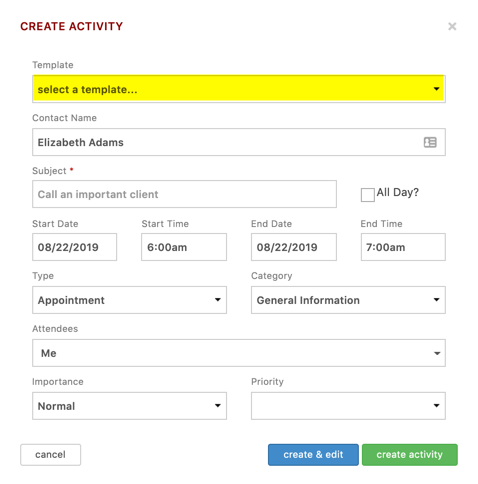
Now, let’s take a look at using an Activity Template to create a new Activity. In this instance, let’s say we want to follow-up with client Elizabeth Adams via phone about some outstanding items from a recent meeting. After selecting to add a new activity from Elizabeth’s record, you’ll see the below:

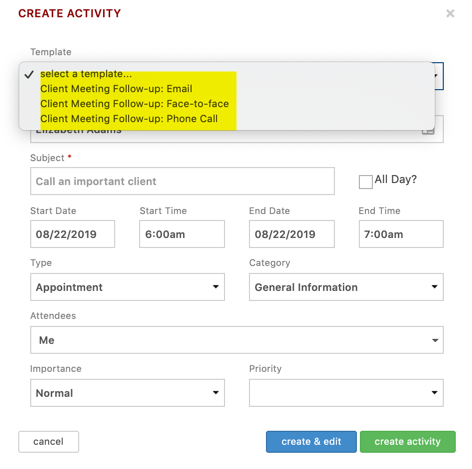
As indicated above, the very first option in your Create Activity modal is the selection of an Activity Template. If you click inside that box, you’ll see all available templates within your database:

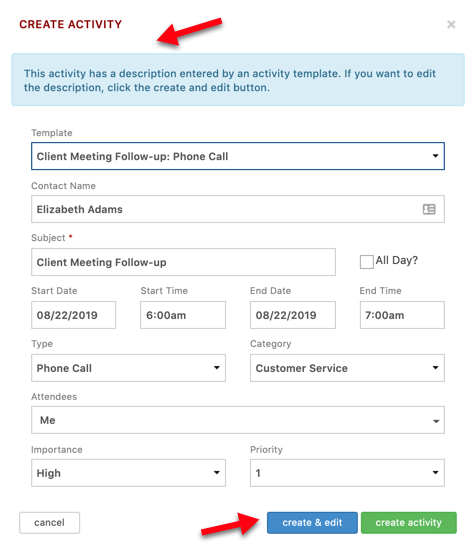
If you were to select “Client Meeting Follow-up: Phone Call” here, you might see something like the below:

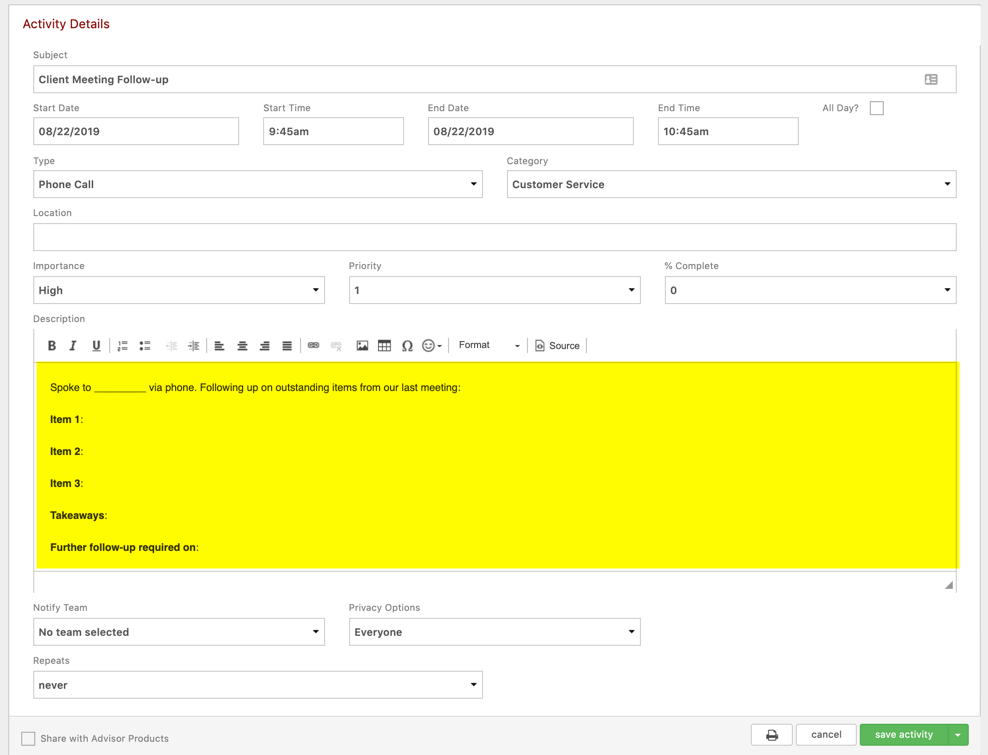
What you’ll find is that all fields that you established a value for in your template will now be updated here to reflect those values. Also, note the text at the top alerting you that default information has been entered for the activity’s description. If you want to go ahead and take a look at that, or make any additional edits to it, click “create & edit” here, rather than simply clicking “create activity”. You’d then see the new activity’s Details page:

The Description area is highlighted in yellow above, and you can see the default text that was entered as part of the Activity Template. You can make edits to this prior to, during, or after the period when you’re actually carrying out the Activity. Click the “save activity” button to finish creating your activity from the template.
Setting up and using these Activity Templates will allow you to save your time for focusing on the elements of Activities that differ (their substance) rather than the elements that remain largely the same.
If you’d like some ideas to kickstart Activity Template creation within your office,
our Training Team has some Sample Activity Templates you might want to view here.
In our next Manage Your CRM series post, we’ll take a look at Managing Automation Templates in Redtail CRM.
As always, if you have any questions along the way as we address these, you can reach out to our team at support@redtailtechnology.com or 800.206.5030. We are always happy to help you understand any aspect of Redtail CRM better so that you can better put it to use in your business!

