
Redtail CRM offers subscribers a ton of opportunities to customize their CRM, both at the individual and at the database level. These opportunities for customization are important because they allow you to set your database preferences and lists up in ways that work the best for both you as an individual as well as for your office. Taken together, these customization options will help drive user adoption and, ultimately, help you streamline your processes while at the same time personalize and improve the client experience your firm provides.
The CRM preferences we’ll consider in this post fall under the category of “Activity Management”.
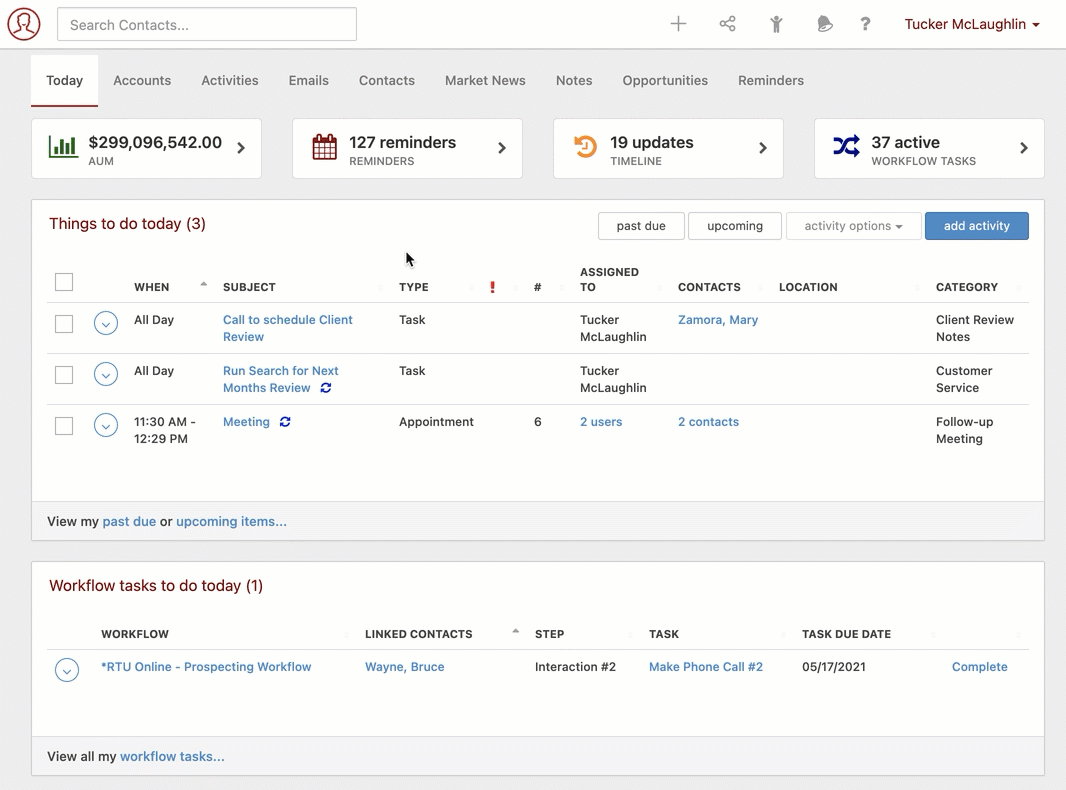
Your Activity Management preferences can be accessed and updated from your Preferences page:
Below, we’ll take a look at each of these Activity Management preferences and how you might customize them. Note: these options are user-specific, and will take effect in your database only under your login credentials.

Prior to considering each of these individually, let’s take a quick look at where you’ll encounter the results of your preferences here when working in your CRM. When creating an Activity in Redtail, the first screen you will see is the below:
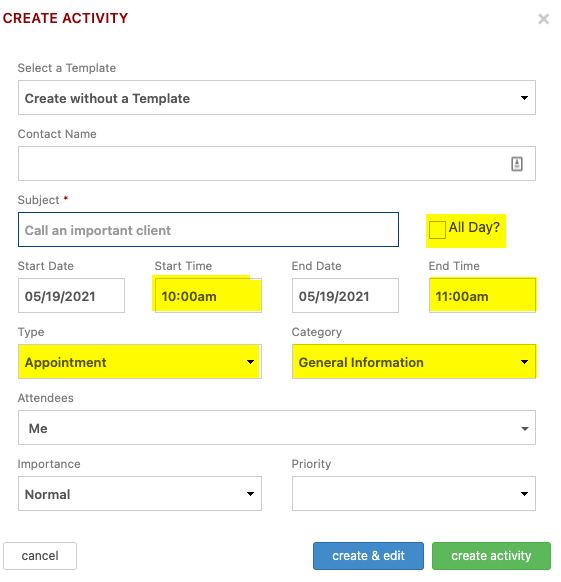
If you compare the highlighted areas in the “Create Activity” image above to the “Activity Management” preferences image immediately preceding it, you’ll see that the preferences indicated there pre-filled some of your data for you when beginning the creation of your activity.
- “All Day?” is not checked off, because “Default to Create All Day Events” is set to “No” in your preferences.
- The time between the beginning and ending of the activity is one hour because your “Default Activity Duration” is set to “60 minutes” in your preferences. Note as well that were your “Default to Create All Day Events” preference set to “Yes” that your “Start Time” and “End Time” boxes would be greyed out, as they wouldn’t be applicable for All Day events.
- The Type is set to “Appointment” and the Category is set to “General Information” because these are your default preference settings for “Default Activity Type” and “Default Activity Category” respectively.
Do bear in mind that these Preference settings are intended to streamline the activity creation process for you. We understand not all of your activities will use every one of these default preferences. You can easily select/deselect the “All Day?” option, select a different Activity Type and/or Category, and change the duration of an Activity when the need arises.
Default to Create All Day Events
Your options here are straightforward: Yes, or No. If you tend to create Activities that don’t require performance at a specific time during the day, you’d likely want to choose “Yes” as your preference. All-Day activities sit at the top of your Calendar, allowing those activities to function almost like to-do lists that you can check off whenever you accomplish them during the day.
If, on the other hand, a majority of your activity creation is for events that need to occur at a specific time, you’d likely want to choose “No” as your preference.
Default Activity Type
Your options for “Default Activity Type” include a handful of “System Types” as well as any number of Types that your database admins have created within Redtail CRM.
Default Activity Category
Your options for “Default Activity Category” include a handful of “System Categories” as well as any number of Categories that your database admins have created within Redtail CRM. Note: categories created within your database for activities are also the categories you can apply to notes, workflows, and documents.
Default Activity Duration
Three options here: 15 minutes, 30 minutes, or 60 minutes. As with all of these preferences, you can adjust them on-the-fly during activity creation, but just choose the one that you believe is closest to the duration for a majority of the activities that you create.
Tips for determining how to set your Activity Management preferences (by taking a look at your historical record of activity creation)
Maybe you’re unsure about what your best options for your default settings here should be. The great thing is you can revisit your Activity Management preferences at any time to make adjustments. But, since having these default settings in place can streamline your processes and save you a lot of time over the long run, it’s best to choose the defaults you actually use the most in order to achieve those efficiencies.
So, if you’re uncertain about how you should set one or more of these defaults, we do have some suggestions that may help you get a handle on that:
- Visit your Activities by Contact Report. It isn’t tied to your Activity Management preference settings in any way, but it will allow you to get a quick historical view of how you’ve set up your activities in the past in regard to these four preferences.
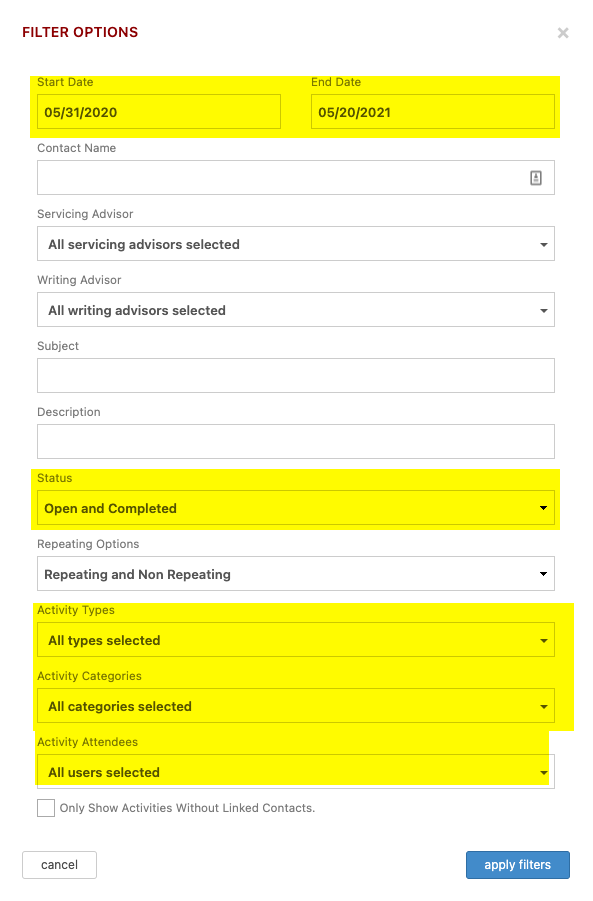
- Click the “filter” button for that report, where you’ll then see the below:

- In your Filter Options, set your Start and End Dates far enough apart so you can see a good representative sample of activities created over time. Depending on how much use your office makes of activities that date range will vary.
- Set Status to “Open and Completed” – this is so you can see all activities within your date range that meet the parameters established by your other filters.
- Set Activity Types and Activity Categories to “All types selected” and “All categories selected” respectively.
- For Activity Attendees, you’ll want to change “All users selected” to yourself as well as the other database users for whom you create activities. Remember, these preference settings are for your login only, so they should reflect what your default settings should be.
- Then, click the “apply filters” button.
- After your Activities by Contact Report has refreshed to reflect your filter settings, you can then click the “export” button next to your “filter” button.
- This will download the data and allow you to open it up in Microsoft Excel, where you can then use Excel’s Data Sort capabilities to sort by either your Type or Category columns to get a better idea of which of each of these you may use the most. Note: you can sort the Activities in the Activities by Contact Report itself by clicking on either (Type or Category) of those headers. This may allow you to make a determination of which you use more of, but, if you have hundreds or thousands of activities in your report this will require scrolling through multiple pages of the report.
- In order to determine how many All Day activities are in your Excel file, you can use Excel’s Find option to search for “All Day”. When you see the total number, divide it by two (“All Day” is displayed in both the Start Date and End Date columns) and then compare the number you find to the total number of rows in your spreadsheet. If that number is less than half of the number of rows in your Excel file, leave your “Default to Create All Day Events” preference set to “No”.
- Activity Duration may be a little trickier to determine (unless the majority of your activities are All Day), but you can likely scan through the Start and End Dates in your file to determine whether or not you can get a feel for the most common duration you assign to activities.

Final thoughts: this method of determining how you should set your default Activity Management preferences isn’t foolproof, but it should offer you some guidance. And, if you later feel like one or more of your preferences should be different, it’s very easy to go back into your Preferences and make that change.
In our next Manage Your CRM series post, we’ll take a look at Calendar Management preferences.
As always, if you have any questions along the way as we address these, you can reach out to our team at support@redtailtechnology.com or 800.206.5030. We are always happy to help you understand any aspect of Redtail CRM better so that you can better put it to use in your business!
