Redtail CRM offers subscribers a ton of opportunities to customize their CRM, both at the individual and at the database level. These opportunities for customization are important because they allow you to set your database preferences and lists up in ways that work the best for both you as an individual as well as for your office. Taken together, these customization options will help drive user adoption and, ultimately, help you streamline your processes while at the same time personalize and improve the client experience your firm provides.
Within Redtail CRM, you have the ability to create Automation Templates for ongoing use by all users of your CRM. Automations allow you to stipulate that if certain Events occur within your database, further Actions will be triggered and happen automatically.
Automation Templates can be built by any of your database users, and, once built, are accessible by all of your database users. Let’s take a look at creation and usage of Automation Templates in Redtail CRM.
Creating your Automation Templates
To begin setting up an Automation Template, select Manage Your Account after clicking your Name from the Top Right Menu within Redtail:
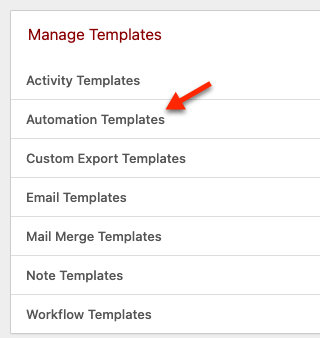
Then, click “Automation Templates” in the Manage Templates area:
You’ll then see the below (if there are currently no Automation Templates set up in your database):
Click “add” and you’ll arrive at the page where you can begin setting up your Template:
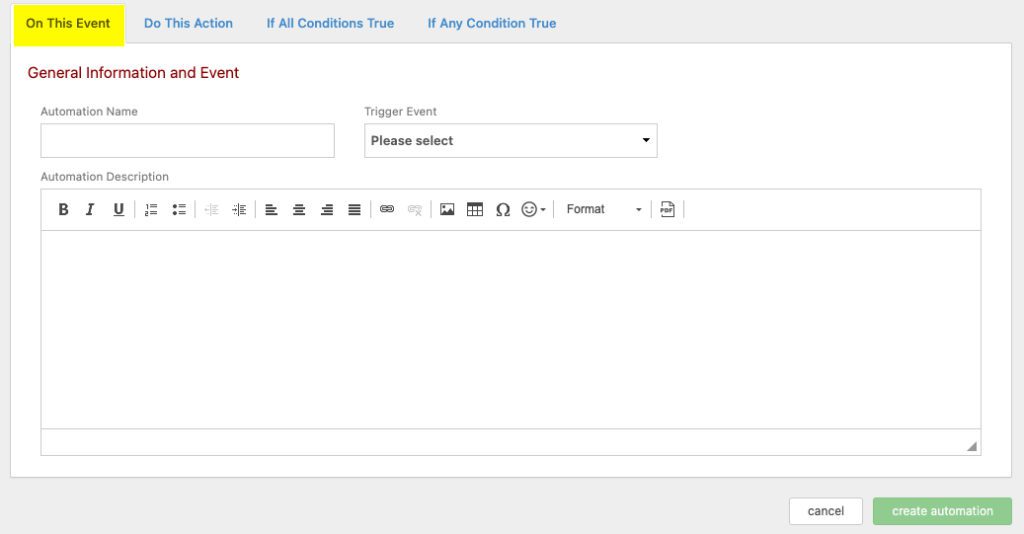
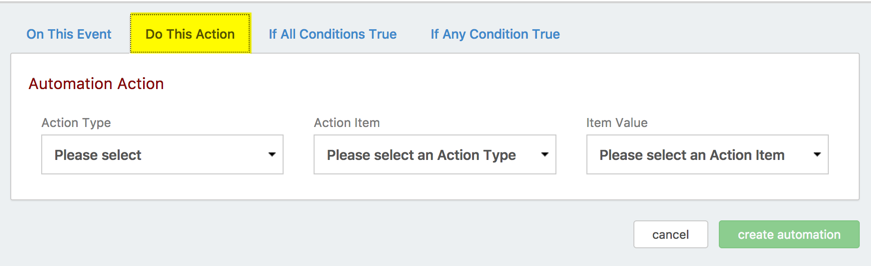
Setting up Automation Templates involves four tabs: On This Event, Do This Action, If All Conditions True, and If Any Conditions True.
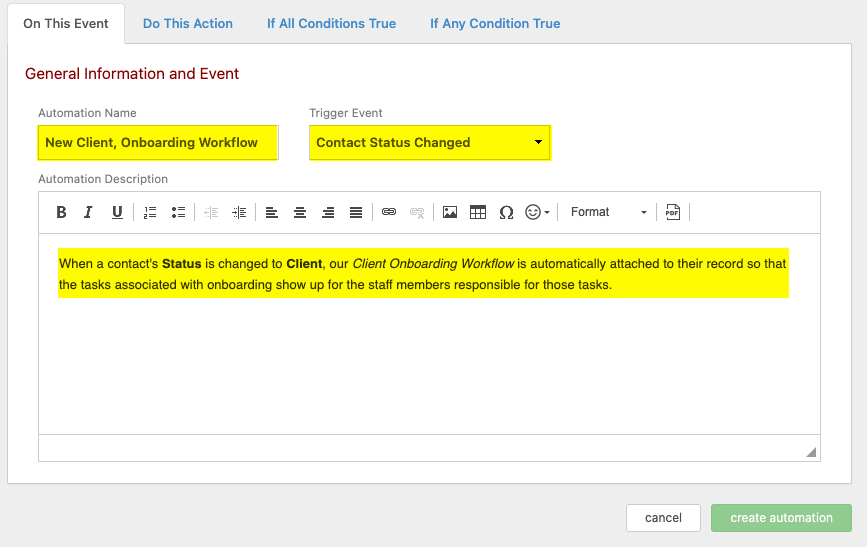
Above we are looking at the On This Event tab. Here you will provide your Automation Name, the Trigger Event, and a Description of the Automation. I’ve done this in the screenshot below:
The Automation Template I’m establishing here will attach our Client Onboarding Workflow to any contacts in our database when their Contact Status is changed to Client. Note that my Automation Name indicates this while my Automation Description spells this out in more detail. These are both freeform text fields.
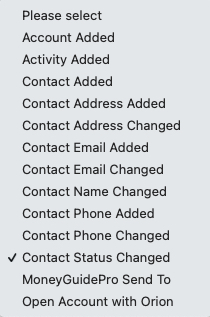
My Trigger Event was entered by clicking inside that box and selecting from the list of currently available events that can serve as Triggers:
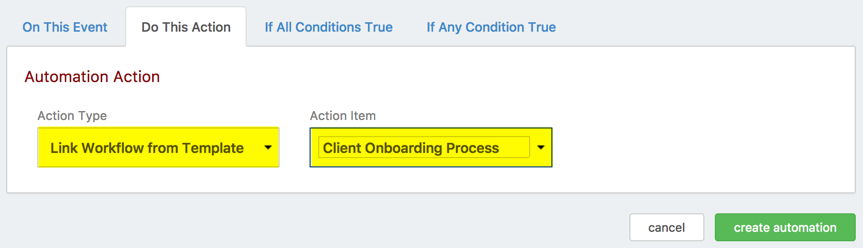
I can now go to the next tab, “Do This Action”:
Here, I’ll select an Action Type, Action Item and Item Value (Note: the available values for the last two will vary dependent upon what you select as your Action Type):
I selected “Link Workflow from Template” as my Action Type — this removed the Item Value box because all that was needed was for me to then select the Action Item, which is the Workflow within my database that I want to attach as the Action Item. Should you choose one of the other available Action Types, you’d see different options.
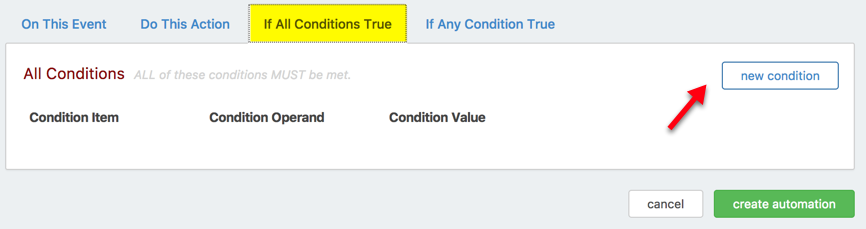
I’ll next click the “If All Conditions True” tab and see the below:
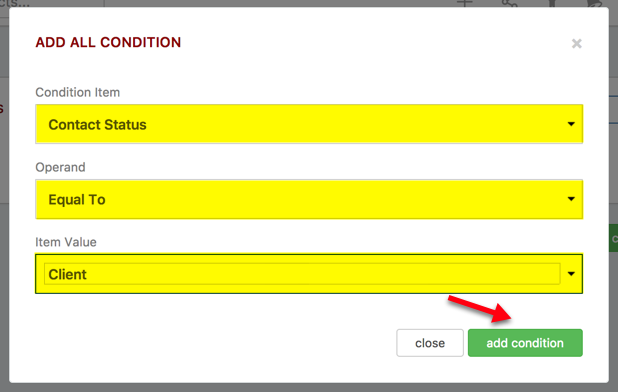
Here is where I’ll select the conditions for the Trigger Event set up on the first tab. I’ll click New Condition and then see the below:
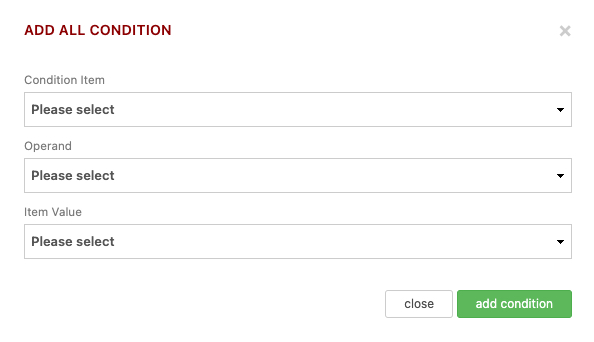
From this area, I’ll click inside each box to set my Condition as below:
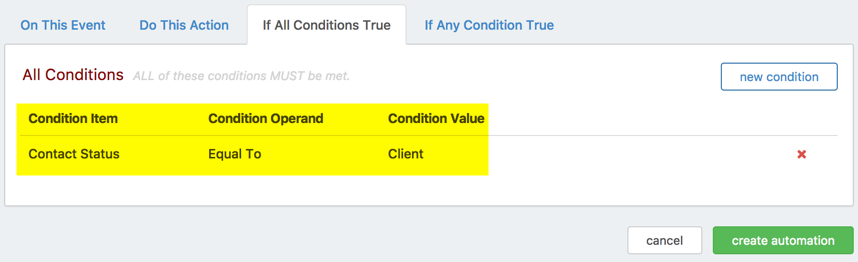
I’ll then click “Add Condition” and see the below:
At this point, we’d be ready to create this Automation, using the “Create Automation” button in the bottom right corner. But, should you have an Automation that has additional conditions that should be met prior to going into effect you could add more conditions here first. Or, if you had an Automation that instead should be triggered based upon any of several different conditions being met, you’d instead go to the next tab and add those there.
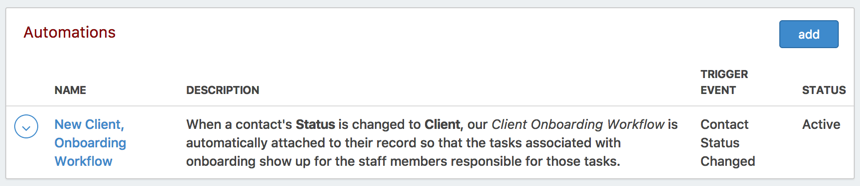
After clicking “Create Automation”, I’ll be back on my main Automation Templates page and will see the template we just created:
Clicking the Actions menu to the left of an Automation Template will provide you with options for General Edits (Name, Description, Active or Inactive), Change Automation (edits to any part of the Automation), deleting the Template, or deactivating the template.
Going forward, unless you set the Automation Template to Inactive or delete it from your database, the triggering event you indicated will lead to the action you indicated, based upon the conditions you set for the Automation.
Setting up Automation Templates can lead to huge time savings around many of the common trigger and action items available to choose from in your templates.
In our next Manage Your CRM series post, we’ll take a look at Managing Custom Export Templates in Redtail CRM.
As always, if you have any questions along the way as we address these, you can reach out to our team at support@redtailtechnology.com or 800.206.5030. We are always happy to help you understand any aspect of Redtail CRM better so that you can better put it to use in your business!
Posted by: Redtail Technology About: Redtail Technology, Inc. is a leader in web-based Client Relationship Management solutions for financial advisors.


 From this area, I’ll click inside each box to set my Condition as below: