
Redtail CRM offers subscribers many opportunities to customize their CRM, both at the individual and at the database level. These opportunities for customization are important because they allow you to set your database preferences and lists up in ways that work the best for both you as an individual as well as for your office. Taken together, these customization options will help drive user adoption and, ultimately, help you streamline your processes while at the same time personalize and improve the client experience your firm provides.
You can browse all prior posts in this series here. In this post, we’ll take a look at how you can manage Database Lists, particularly those associated with Client Accounts.
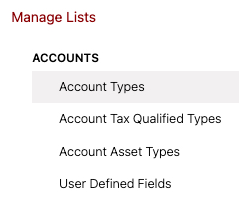
To manage those account data fields within Redtail CRM that are customizable, you can go to Manage Your Account -> Admins Only -> Manage Database Lists (note: if you are not an admin user of the database or the database owner, you would not have access to customize these lists):
You’ll see the Client Account fields that you can manage are listed at the top of the Manage Lists area:
By altering these lists, you can add or remove items from the dropdown menus for specific fields related to the account. For example, if you edit the “Account Types” list and remove an option, it will no longer appear as a dropdown option when a database user is editing the Account Type field for a particular account.
Conversely, if you add a new item to the list, it will become available as a dropdown selection for the relevant field when editing the account.
Overall, the changes you make to these lists will impact the available options for database users, potentially improving the accuracy and consistency of data entry, as well as ensuring that all necessary options are available for the specific fields related to the account.
The process for customizing the available Account Types, Account Tax Qualified Types, and Account Asset Types within your database is the same, so we’ll only walk through customizing your Account Types list here. We’ll then move on to customizing your Account User Defined Fields list after that, as the process is somewhat different than for the first three Account lists.
So, let’s take a look at customizing your Account Types.
After you’ve clicked Account Types from the Manage Lists area, your page will display the list of Account Types currently available in your CRM. Since the Account Types list is typically lengthy, a sample of only a partial list is below:
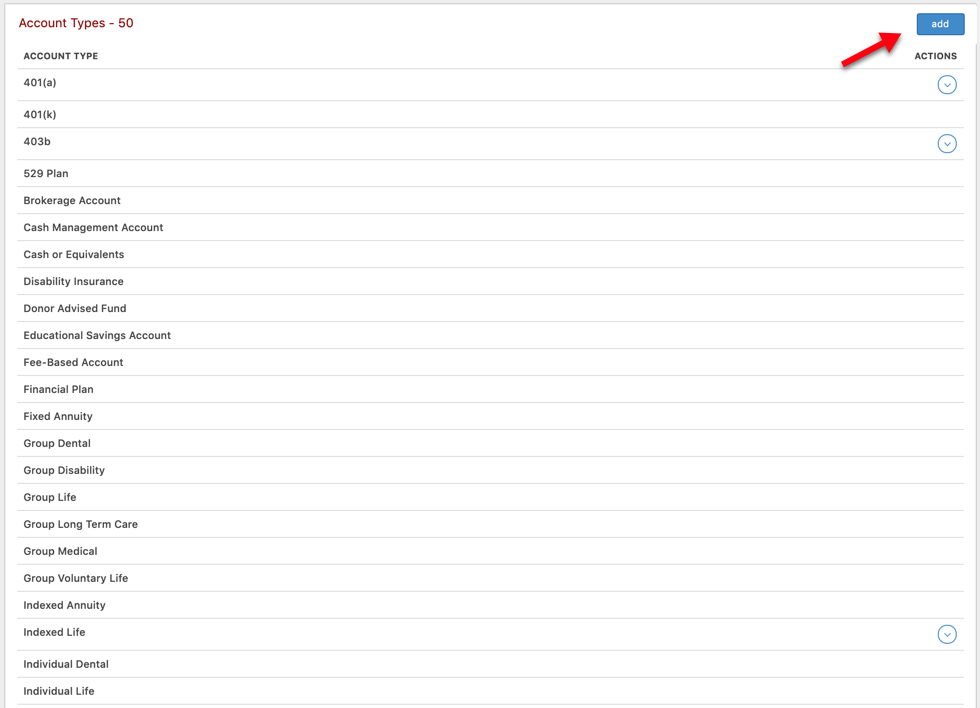
You can add new Account Types by clicking the add button in the top right corner. You’ll then see the below:
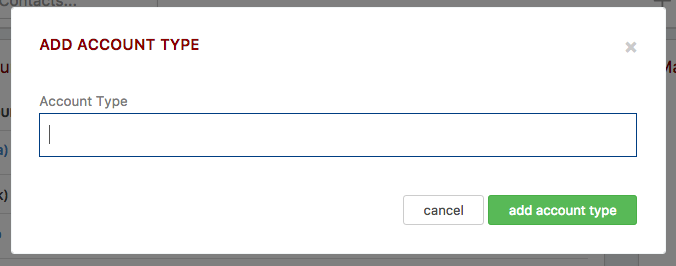
Just type in the name for your new Account Type and click the add account type button. After adding your Account Type, it will then be available in the Account Type menu when adding or editing an account:
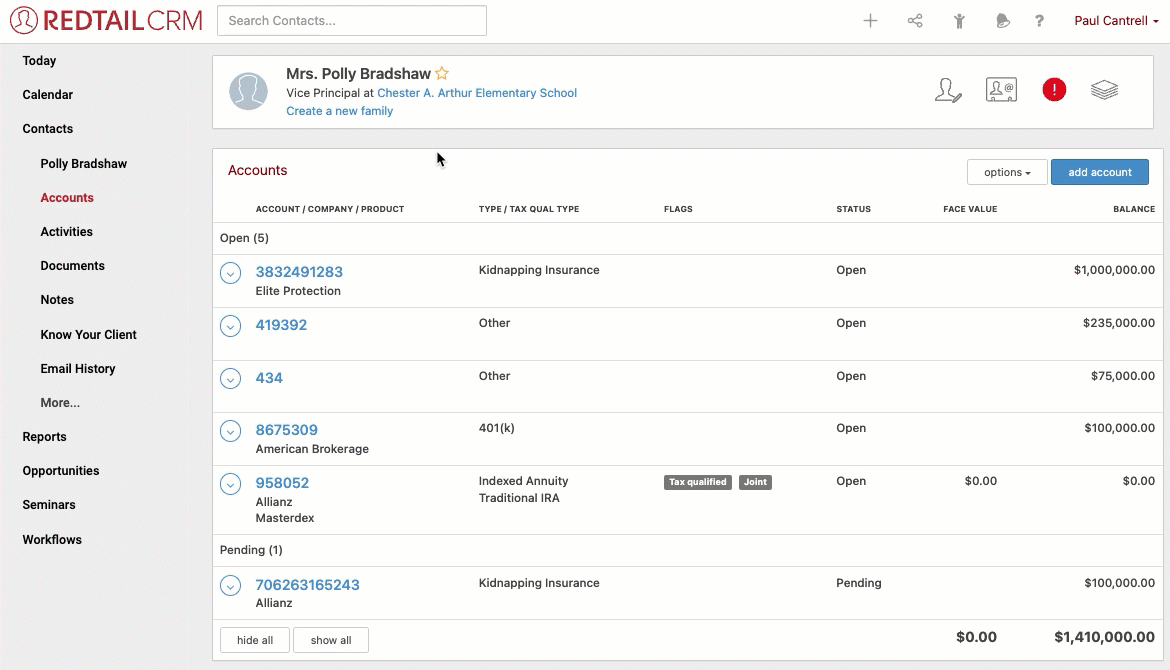
Account Type is also a searchable field from your Advanced Search page (this applies to Account Tax Qualified Types and Account Asset Types as well).
Those Account Types that have been manually added to your database—as opposed to being System Account Types—will have both Edit and Delete options available from their Actions menu, meaning you can edit their name or delete them entirely, as necessary:

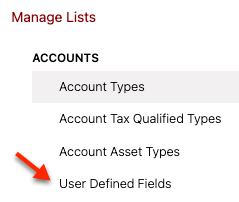
Now, let’s take a look at customizing your Account User Defined Fields list. To access that page, you’ll need to click User Defined Fields from the Accounts area under Manage Lists:
You’ll then see the currently available Account UDFs that can be assigned to your Accounts:
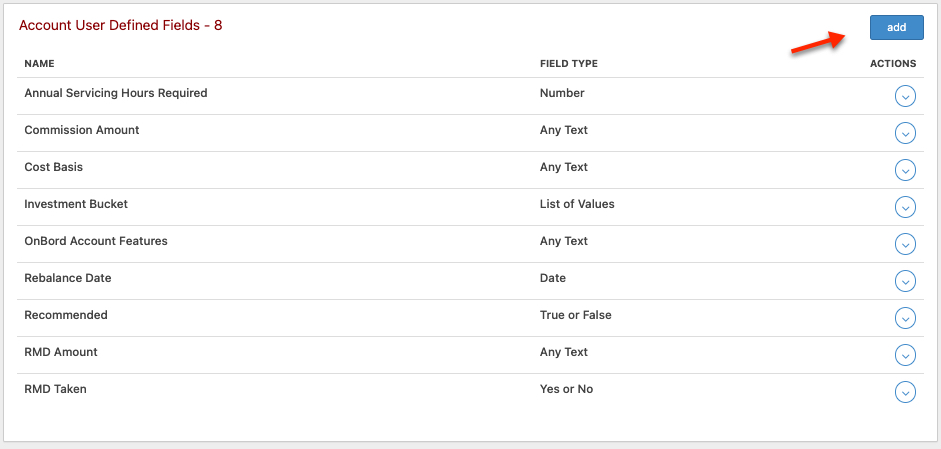
You can add new Account UDFs by clicking the add button in the top right corner. You’ll then see the below:
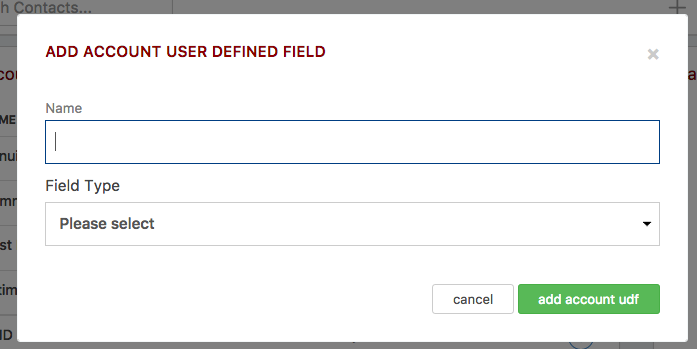
Account UDFs can be set up in six different ways, where the value you enter for them is either text, a list of predefined values, a Number, True/False, Yes/No, or a Date. You can provide any name for your individual UDFs you would like; you’ll just want it to be clear what each name represents since database users will be selecting them from a dropdown menu. The name should spell out each UDF’s purpose as much as is possible.
Let’s take a look at each of those below.
Any Text
Account UDFs set up with a Field Type of “Any Text” allow you to enter any value (any string of text) for the UDF when assigning it to an account:
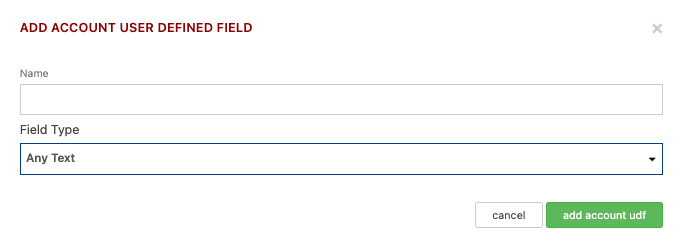
You’d want to use this Field Type when the Field Value is likely to be different for most accounts to which you might assign it and when none of the other Field Types will work for the input value required. After naming your UDF and selecting this Field Type, click the “add account udf” button and this UDF will be available to assign to your accounts as needed.
List of Values
Account UDFs set up with a Field Type of “List of Values” allow you to set up a predetermined list from which to choose when assigning it to an account. You’d want to use this Field Type when the Field Value is going to be limited to a certain number of viable options. After naming your UDF and selecting “List of Values” as the Field Type, you’d then see a “Values” area beneath the Field Type:
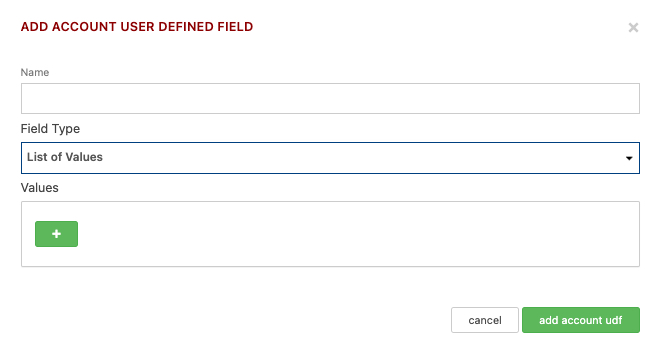
Your next step would be to then add that List of Values from which you can choose when assigning the UDF to an account. To do so, click the green “+” icon shown above. You’d then see the below:
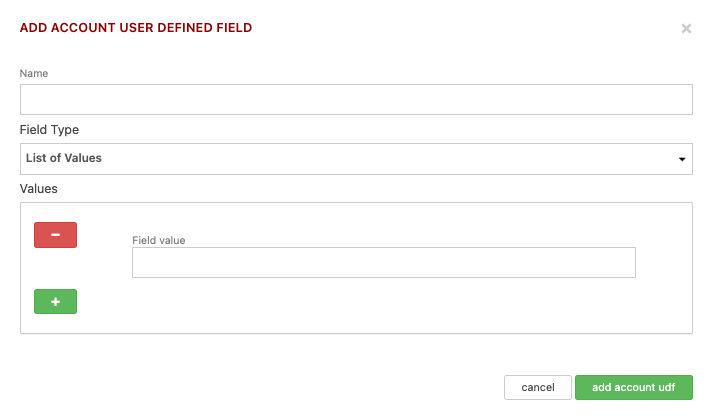
You can then enter your first List item in the Field value box, and continue clicking the “+” icon and adding more until you’re done:
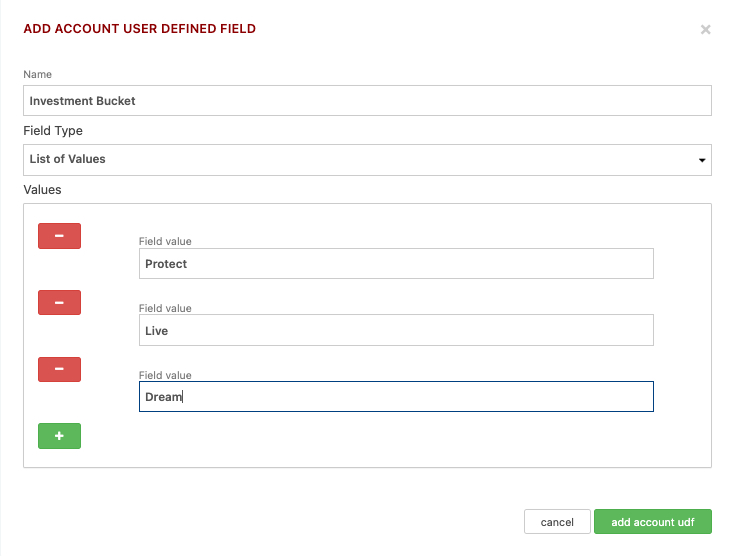
After naming your UDF and selecting this Field Type and adding all appropriate values, click the “add account udf” button and this UDF will be available to assign to your accounts moving forward as needed.
True or False / Yes or No
While True or False and Yes or No offer distinct choices as a Field Type for Account UDFs, they both work in the same way. Here we’ll take a look at setting up an Account UDF with a Field Type of “True or False” — if you need one with a Field Type of “Yes or No” it works in the exact same fashion.
Account UDFs set up with a Field Type of “True or False” allow you to select either “True” or “False” as the value for the UDF when assigning it to an account. You’d want to use this Field Type when the Field Value can only be one of those two choices for any accounts to which you might assign it:
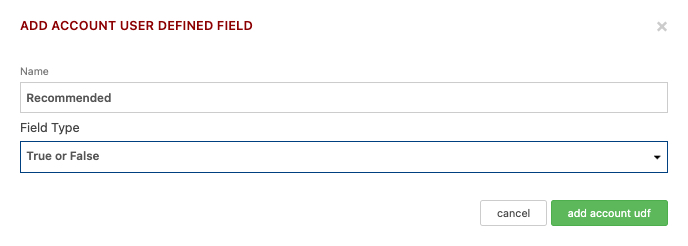
After naming your UDF and selecting this Field Type, click the “add account udf” button and this UDF will be available to assign to your accounts as needed.
Date
You might use an Account UDF that requires a Date as the Field Value for any number of reasons:
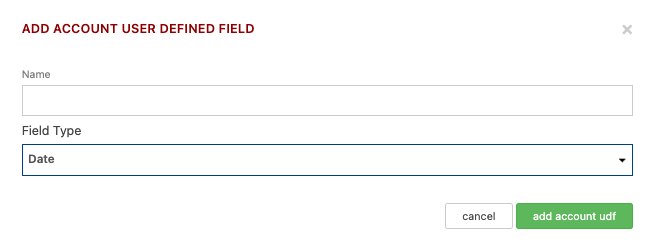 After naming your UDF and selecting this Field Type, click the “add account udf” button and this UDF will be available to assign to your accounts as needed.
Number
Account UDFS can also require a Number as the Field Value:
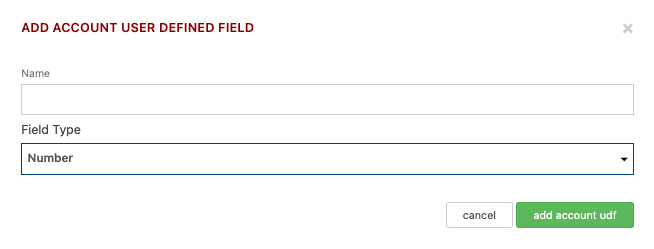
After naming your Account UDF and selecting this Field Type, click the “add account UDF” button and this UDF will be available to assign to your accounts as needed.
When working with your Account UDF List, be aware that all of your User Defined Fields have both Edit and Delete options available from their Actions menu:
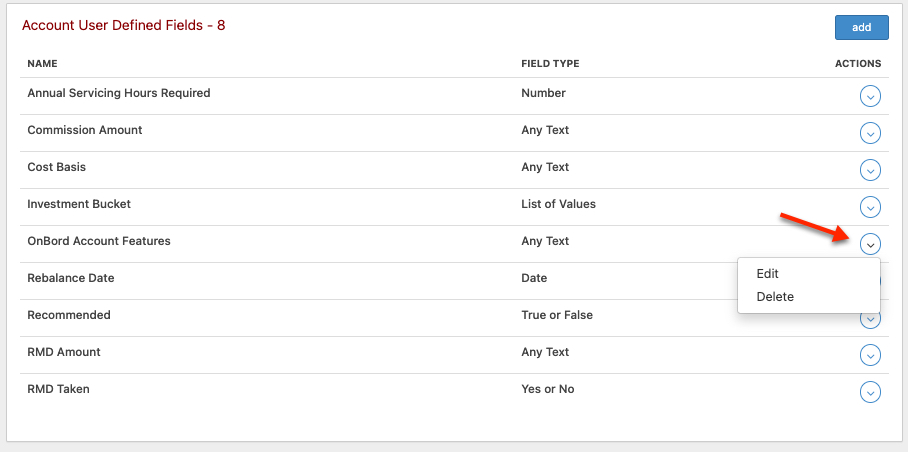
This allows you to edit their name or delete them entirely. Or, in the case of those with a Field Type of “List of Values”, you can also add or remove options from the list of values.
One final thing to mention: each of these four account fields mentioned above is searchable and/or reportable, which allows you to easily find every account that shares a common value for any of them.
In our next Manage Your CRM series post, we’ll take a look at Managing Database Contact Lists in Redtail CRM.
As always, if you have any questions along the way as we address these, you can reach out to our team at support@redtailtechnology.com or 800.206.5030. We are always happy to help you understand any aspect of Redtail CRM better so that you can better put it to use in your business!
0846-OAT-3/23/2023
