
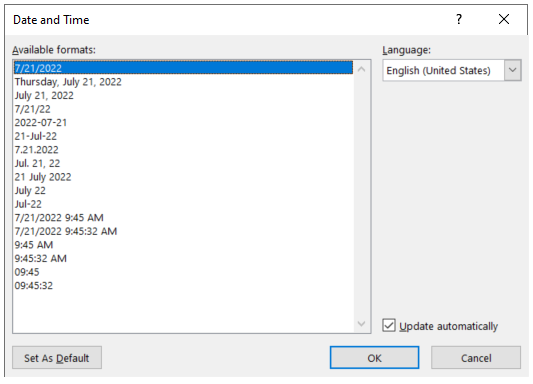
Make your selection and click OK.
Adding Mail Merge Fields to your Template
If you’re ready to begin adding Mail Merge Fields to your template, the process is largely the same regardless of the version of Word you are using. The one difference is how you go about getting to the dialog box which allows you to add fields. In older versions of Word, under the Insert menu choose Field. In versions available since 2007, the Field option is available in a dropdown menu under Quick Parts on the Insert menu:

Either way, the dialog box below is what you’ll be working with. Instructions for completing it are below the dialog box:
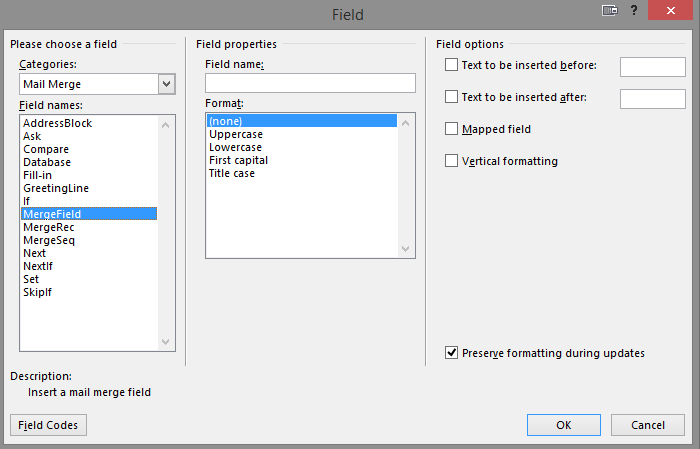
Categories: Choose “Mail Merge” from the dropdown box.
Field Names: Choose “MergeField” from the choices available. Options under Field Properties do not become available until you have performed this step.
Field Properties: In the Field name text box, type in the Merge Field name you want to use (pick from the list of acceptable Field names on Redtail’s Mail Merge Fields document.)
Format: Leave this as “(none).”
Click OK and the dialog box will disappear.
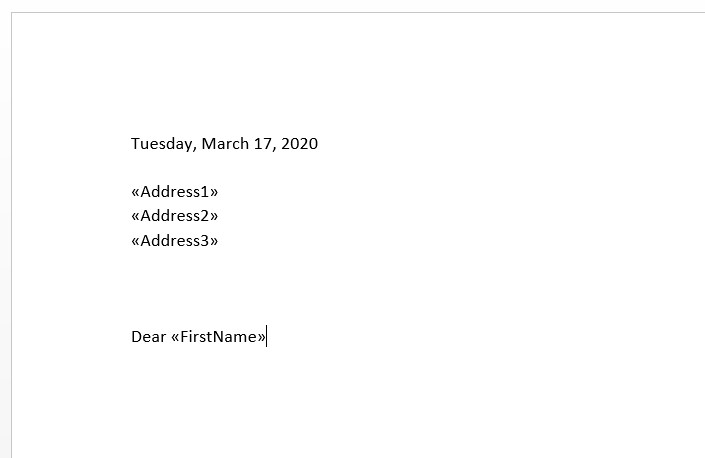
You’ll then see the example below (where we used “Firstname” as our Field name) in your Word document, indicating the Mail Merge Field for First Name is now in your document (along with the verbiage around that merge field:

Note: if you wanted to include personalization to a spouse as well if one is present, see instructions here for doing so.
Proceed to add all the Mail Merge Fields that you need in your document. NOTE: It’s important to remember that if you’re adding an address block you should always add all three lines of the address. If a recipient doesn’t have address information that would ordinarily populate the Address 2 field, the spacing will adjust automatically within the document intended for them. If including an address block, it should look like the example below once in your document:

If you created a Mail Merge Document Template that included a Date & Time, an Address Block and a Salutation addressed to a First Name, the template might look something like the following:
If this were your document and you were happy with the layout, your next step would be to save the Word document somewhere on your computer so that you can upload it for use within your Redtail account. We recommend creating a folder either on your desktop or somewhere else that you can remember easily and calling the folder something like Mail Merge Document Templates for Redtail. Save your templates to this folder so you can easily find them when attempting to upload to Redtail. Note: You must save the file as a Word 97-2003 Document (*. doc) in order to be able to upload and use it as a mail merge template in Redtail.
Once the document is saved, you can then navigate within your database to Manage Your Account –> Mail Merge Templates. You’ll then see a library of your current Mail Merge Document Templates, if any. To the left of each existing template’s name, you’ll find an Actions menu you can click to Edit (Name or Category), Download, or Delete a template. In the Select Files area to the right of your templates, you should see an add files link:
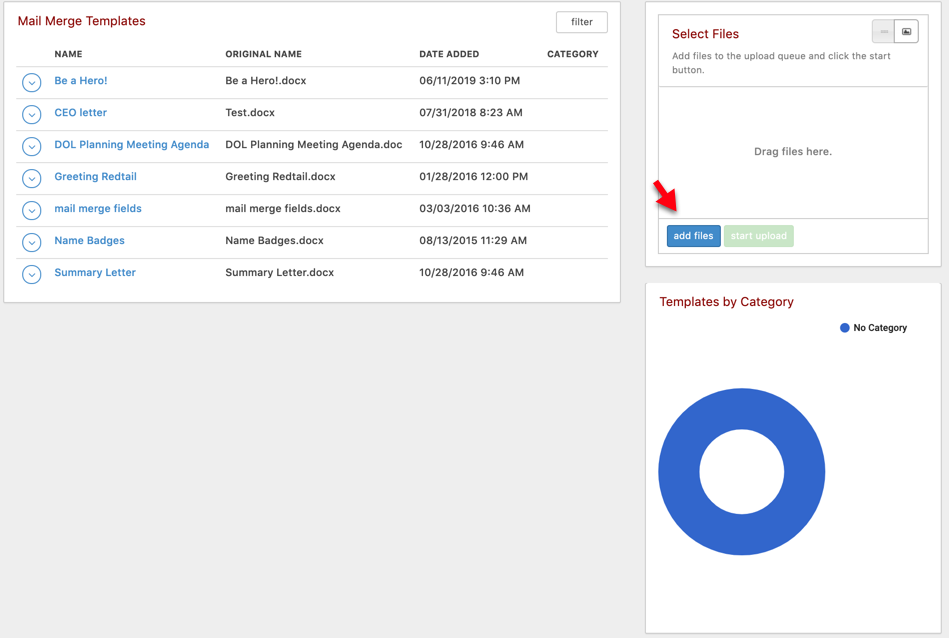
Click Add Files to locate the template file you just saved on your computer. Once you locate that file and click Open, you can then click the “start upload” button. After upload, the template will be available for your use in your library of current Mail Merge Templates.
Note that you also have a “filter” button that will allow you to filter the Mail Merge Templates you are viewing based upon any Categories you may have assigned to them.
Also, to the right of your Templates is a Templates by Category area, which is a visual representation of your Mail Merge Templates by Category (if you assign Categories to your Templates).
Run a mail merge in Redtail CRM
Here, we’ll look at how you can run merges with these templates for either individuals or groups of contacts.
Mail Merges for Individual Contacts
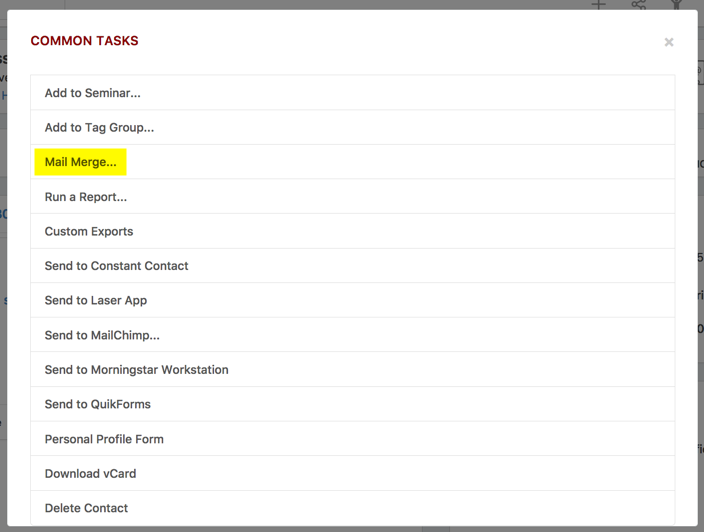
Go to the record of the individual contact for whom you want to run a mail merge. Click their Common Tasks icon:
Select Mail Merge in the resulting modal:
You’ll then see the below:
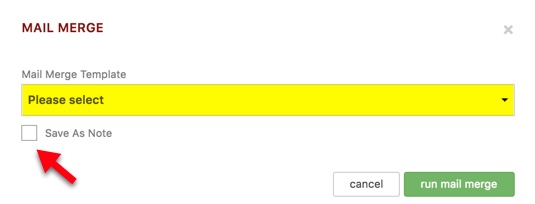
If you click inside the highlighted area, you’ll see all templates that have been uploaded to your database for mail merge. You can also check off the “Save As Note” box to create a note indicating this mail merge was performed on the client record. Select the Template you want to use and then click Run Mail Merge.
Your merge will run and download to your machine (or, if it is a larger merge job, will be available in your Manage Downloads area once complete). You can then open it up to use as you had intended.
Mail Merges for Multiple Contacts
Mail Merges can be arrived at for groups of contacts in a number of ways, but they all launch finally from the Advanced Search page. So, whether you are working with a group of contacts you have previously tagged or a new group you’ve just queried, in order to run a Mail Merge for them you must do so from the Advanced Search page.
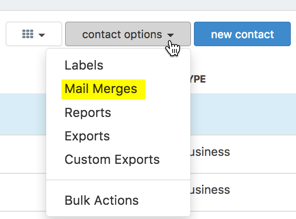
When your group of contacts is on the Advanced Search page, and you’ve selected the records you want to include in the merge, click the Contact Options menu and select Mail Merges:
The procedure is then the same as indicated above for individual contacts.
Note: when including a Head of Household and a Spouse in a Mail Merge or Labels, if there is an address marked Primary for the Spouse, that is what will pull for the Spouse. If they don’t have an address designated Primary, the Head of Household’s Primary address will pull for the Spouse as well.
Above, we’ve shared the basics of how to create and upload a mail merge template as well as how to run mail merges for individuals or groups of contacts. Below are links to more Redtail documentation that will assist you with different aspects of using mail merges in Redtail to customize your database and streamline your operations.
How do I address a letter to both spouses when running mail merges?
How do I create Mailing Labels or Envelopes in Redtail?
How do I create custom labels for use with Redtail?
How do I create and upload a mail merge template for use with Redtail using Word for Mac?
Manage Your Account: Manage Downloads
Sample Mail Merge Name Tag Templates
Sample Mail Merge Card Templates
Sample Mail Merge Letter Templates
Sample Mail Merge Envelope Templates
You can also view a recorded webinar on this topic here.
In our next Manage Your CRM series post, we’ll take a look at Managing Note Templates in Redtail CRM.
As always, if you have any questions along the way as we address these, you can reach out to our team at support@redtailtechnology.com or 800.206.5030. We are always happy to help you understand any aspect of Redtail CRM better so that you can better put it to use in your business!
