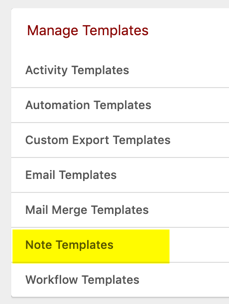
You’ll then see existing Note Templates in your database (if any):

Click “new” and you’ll arrive at the area where you can begin setting up your Template:
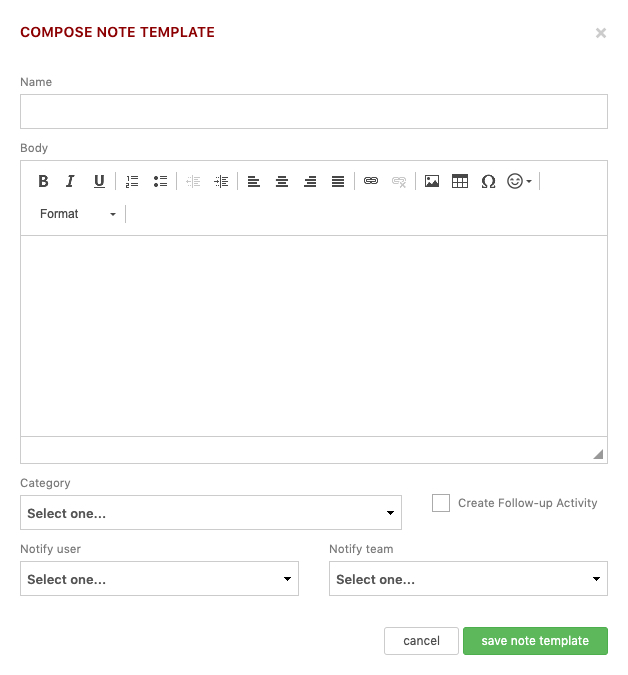
- Name – whatever you enter here will serve as the name of the Note Template. Be very descriptive here, as you need to be able to distinguish between your Note Templates when selecting one during the Note creation process.
- Body – if you are creating a Note Template where much of the text will be formulaic, i.e., the same every time you use this Note Template, you can go ahead and enter that text here – that way you won’t need to retype it whenever using this Note Template. As but one example, for client review meetings, you could have a Note Template with questions you would typically cover pre-filled in the Body of the Note Template. This gives you a roadmap to help you cover all your intended bases, but it doesn’t limit you from adding additional materials into the note when you’re working with it. It’s editable until you save it so you can always remove items that are not covered or are not applicable to a particular client.
- Category – choose from one of your CRM’s system or custom Activities and Notes Categories. Note: there is a “filter” option above your Templates that will allow you to filter which Note Templates you are viewing by Category, should you desire.
- Create Follow-up Activity box – if entry of this type of Note usually requires a Follow-up Activity, check off this box for the template. That way, when you use this template going forward, after saving your Note you’ll automatically be directed to create that follow-up activity.
- Notify user and Notify team – If a specific database user or team should always be notified when a Note is created using this template, you can indicate which user or team that should be here.
Note: for all of the fields above (other than the Name), you can edit these on-the-fly when actually using a Template to create a Note. A completed Note Template to handle 529 Plan inquiries might look something like the below:
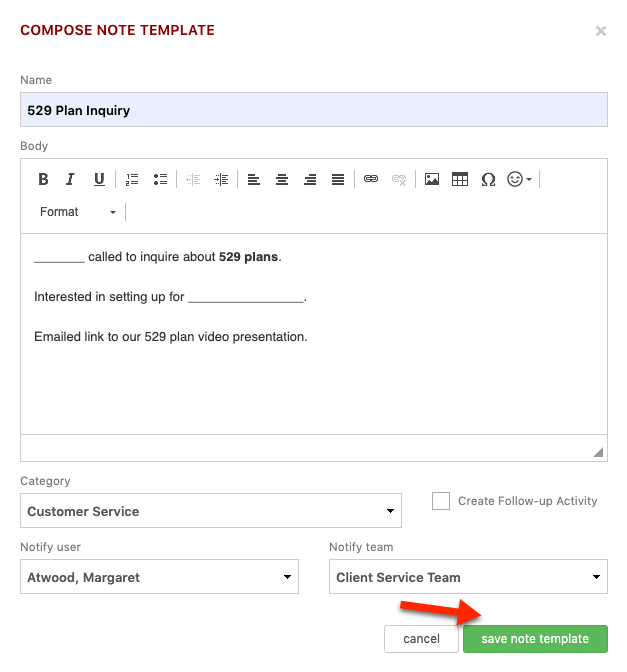
When you’re happy with the information you’ve entered, click “save note template” and it will be available for your use.
Let’s go back to your Note Templates screen before looking at how you would use these to create a Note:
As you can see above, if you click the Actions icon for a Note Template on this page, you can Edit or Delete the template. If you choose the Edit option, you’ll see the same modal that you saw above when adding a new one – of course, it will already be completed. You’ll just need to make any necessary changes and save the template to complete those edits.
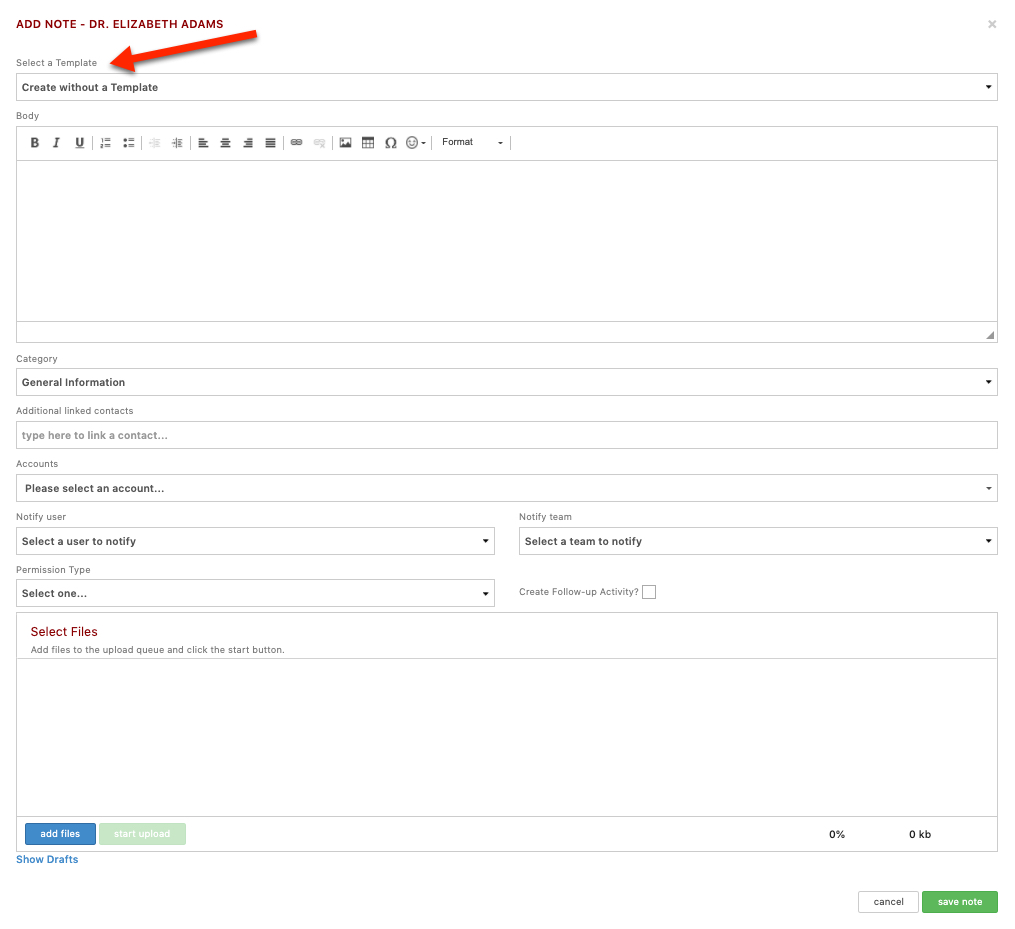
Now, let’s take a look at using a Note Template to create a new Note. In this instance, let’s say client Elizabeth Adams called with questions about setting up 529 Plans for her grandsons Jack and Henry. After selecting to add a new note, you’ll see the below:
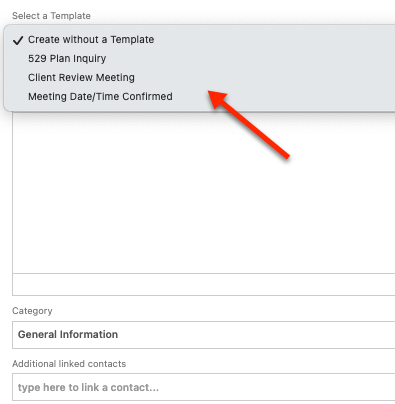
As indicated above, the very first option in your Add Note modal is the selection of a Note Template. If you click inside that box, you’ll see all available templates within your database:
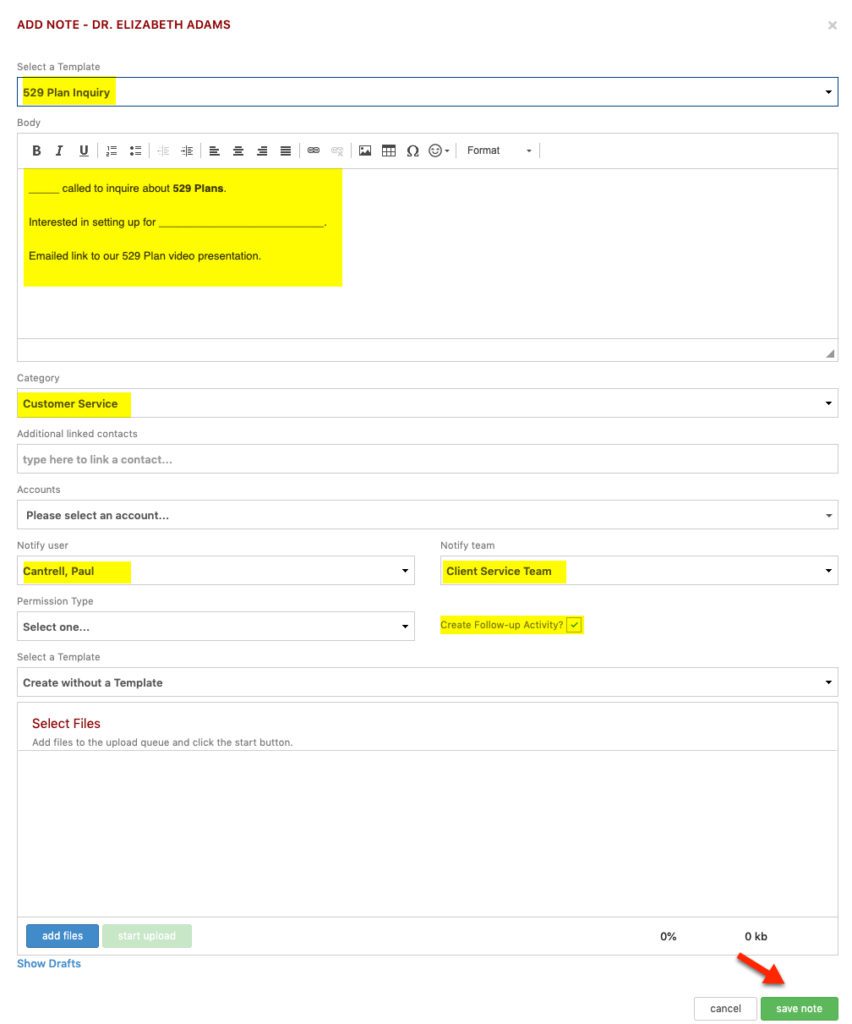
If you were to select “529 Plan Inquiry” here, you might see something like the below:
What you’ll find is that all fields that you established a value for in your template (everything highlighted in yellow above) will now be updated here to reflect those values. You can make any changes necessary (such as filling in the blanks in the Note’s body), as well as completing the fields that are not pre-defined from the template, and then click “save note”.
Setting up and using these Note Templates will allow you to save your time for focusing on the elements of Notes that differ (their substance) rather than the elements that remain largely the same.
In our next Manage Your CRM series post, we’ll take a look at Managing Workflow Templates in Redtail CRM.
As always, if you have any questions along the way as we address these, you can reach out to our team at support@redtailtechnology.com or 800.206.5030. We are always happy to help you understand any aspect of Redtail CRM better so that you can better put it to use in your business!

