You can now save your Standard Report Filters for repeated use
If you find that you consistently apply the same filters to one of Redtail’s Standard Reports to meet the unique needs of your office, you now have the ability to save those filter options for quicker access to the report data you’re looking for!
Let’s run through an example with the Contacts by Category Report to show how you save these and then access them again in the future. Note: while your filter options will vary from report to report, the method for saving filters and accessing saved filters will be the same across reports.
Once you access your Contacts by Category Report, you can click the “filter” button in the upper right corner to begin setting up a saved filter:

Clicking the “filter” button will bring up the applicable filters for whichever report you are working with at the time, set to the filter’s default settings. For the Contacts by Category Report, you’d see the below:
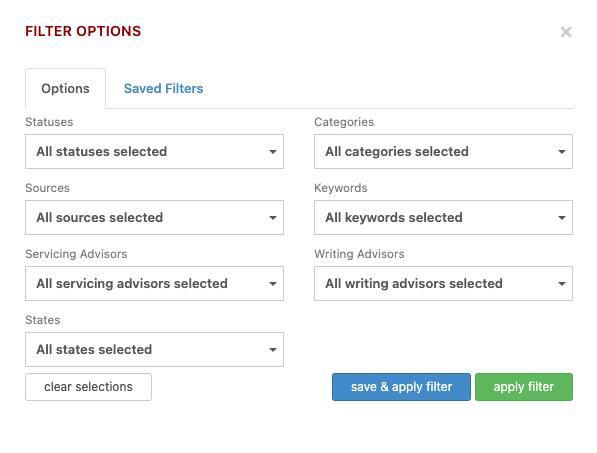
Note: there are two tabs at the top of this — Options and Saved Filters. You’ll use the Options tab to choose your parameters for the filter you’d like to save. After choosing the parameters you’d like to change, your Filter Options selections might look like the below (highlighted area indicates changes):
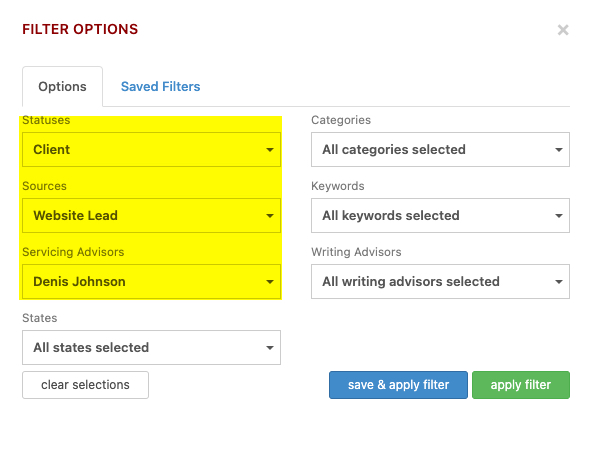
You’ve changed the the Contact Status to “Client”, the Contact Source to “Website Lead”, and limited the contacts to those serviced by “Denis Johnson.” If you only want to run this one time, you can just click “apply filter” to see your report with these filters in place. If, however, you anticipate this will be a report you’ll want to return to again and again, you can click the “save & apply filter” button to make it available for future use. Either way, your filters will be applied once you click one of those buttons.
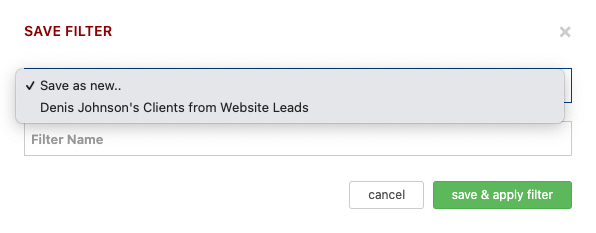
If you do click the “save & apply filter” button, you’ll then see the below:
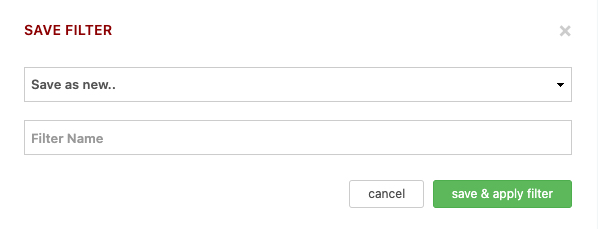
You’ll want to name your filter for the report in a manner that is descriptive enough to make it easily identifiable when you want to return to it again. In the case above, you might choose something like the below:
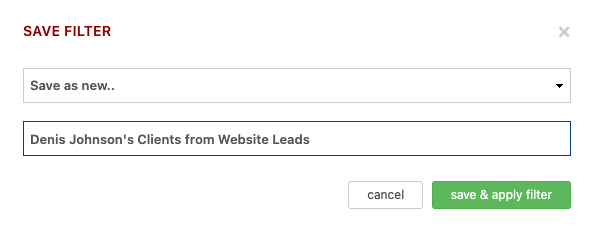
You can then click “save & apply filter” to see the report with those filters applied.
To return to your report at a later time and run those filters without having to go through the setup process again, click the “filters” button at the top of the report and go to the Saved Filters tab:
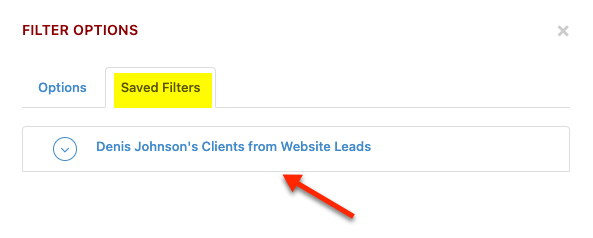
You can then click the Saved Filter title to apply the filters you’d like to apply (in this case there is only one option, but over time you are likely to have multiple Saved Filters for many of your standard reports. Note: this is why it’s important to give your saved filters explicit names so it will be clear at a later time what the filters will return in your report). Note as well that if you click the Actions button to the left of a saved filter’s name, you can rename or delete a filter.
Alternatively, you can edit a Saved Filter if you find you missed something on your initial setup.
To edit a Saved Filter:
- First, apply it from your Saved Filters tab. This will bring up the report with the saved filter applied.
- Then, click the filters button above your report. This will bring up the Filter Options box with the Saved Filters parameters displayed.
- Make any necessary changes to those filter parameters.
- Click the “save & apply filter” button.
- You’ll then see the below where you can choose to save your changes as a new set of filters or to update an existing Saved Filter:
